RV Season is Coming: How to Store and Pack Your Gear the Right Way
RV Season is Coming: How to Store and Pack Your Gear the Right Way
Maple Leaf Self Storage
June 16th, 2026
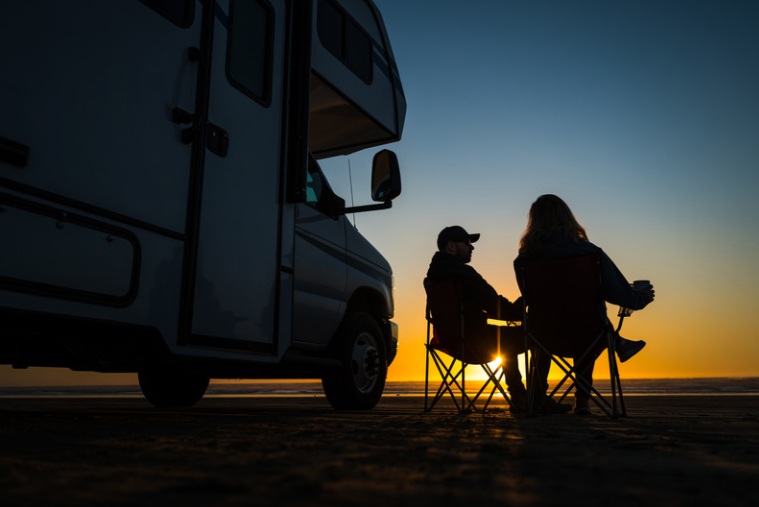
Here’s how to store an RV for winter. RV storage tips Canada campers rely on can help protect your investment and make spring setup significantly easier. Storing camping gear in Alberta takes planning, especially when dealing with changing temperatures, moisture, and limited camping season windows. Whether you're looking for self storage for campers or preparing your RV for camping season, the right setup now can prevent frustration later.
A well-organized storage system means your first camping weekend of the season feels exciting - not like a frantic scramble searching for missing gear or replacing damaged equipment.
RV Storage Basics
Storing your RV during the off season keeps your investment safe and prevents damage. It also ensures you aren't dealing with broken parts when you should be heading out on your first summer trip.
Indoor vs Outdoor Storage
Indoor storage provides protection from UV rays that degrade tires and roofing seals. It eliminates snow load issues. It also reduces risk of pest infestation and provides absolute protection from freezing.
This method is more expensive than outdoor storage and often requiring advance booking.
Outdoor storage is more affordable but is vulnerable to weather. If you choose to store your RV outdoors, invest in a breathable, custom-fit RV cover.
Never use a cheap blue plastic tarp; they trap condensation underneath, creating a breeding ground for mould and mildew.
Not sure whether indoor or outdoor RV storage is the better fit? Maple Leaf Self Storage staff can help you choose the right option based on your RV type, budget, and seasonal usage needs.
Fall Prep & Pre-Winterization
Before you pump antifreeze into your lines, clean the system drain. Remove all food items from the RV. Wipe down cabinets with disinfectant. Clean out the refrigerator, prop the doors open, and place an open box of baking soda inside.
Before storing, take the RV to a dump station and dump the tanks. Empty the black tank first, flush it thoroughly, then empty the gray tank to clean out your sewer hose. Open the low-point drain valves and open all faucets to let gravity pull the water out of the lines.
Turn off the water heater and let it cool. Remove the drain plug to empty the tank. Remember to turn the bypass valves to isolate the water heater tank or you may fill your 6-to-10-gallon water heater with expensive RV antifreeze.
Mice can squeeze through holes the size of a dime, so inspect the vehicle’s underbelly and fill any gaps with brass wool and expandable foam.
Propane tanks should always be stored safely and according to facility guidelines. Improper propane storage can create safety risks and damage equipment over time.
Packing Your Summer Camping Equipment
Here is a practical framework to set up your organization bin system:
Choose the Right Bins
Look for rugged, industrial totes that interlock securely so they stack neatly in your storage unit. Clear bins allow you to instantly see what's inside.
Categorize Your Gear (The "Room" Method)
Group your items by function.
The Kitchen Bin: Stove, fuel, cookware, plates, utensils, coffee maker, sponge, biodegradable soap, foil, and trash bags.
The Bedroom Bin: Tent stakes, footprint, repair kit, sleeping pads, headlamps, and camp pillows.
The Tools & Utility Bin: Mallet, multi-tool, paracord, duct tape, hatchet, fire starters, matches/lighter, and a tarp.
The Comfort & Clean Bin: First-aid kit, bug spray, sunscreen, camp towels, wet wipes, and lanterns.
Always ensure every piece of gear is 100% dry and clean before sealing it inside a plastic bin. Trapping even a little bit of moisture inside a sealed container is where mould and mildew breed, ruining gear by the time your next trip rolls around.
Employ an Effective Labeling System
A label is only good if it stays put and tells you what you need to know.
The Master List:
Label the outside of the bin with its main category (e.g., CAMP KITCHEN) in large, bold letters on multiple sides.
The Sub-Item Checklist:
Tape a detailed index card or a piece of paper to the inside of the lid listing every item that belongs in that bin. When you are packing up camp to head home, you can use this checklist to ensure nothing gets left behind.
Maple Leaf Self Storage can also help you determine the right unit size for your camping equipment, seasonal bins, and RV accessories so everything stays organized and easy to access throughout the year.
Let Maple Leaf Self Storage Be Your RV and Camping Equipment Storage Unit Provider
We have multiple locations in Vancouver and Calgary with a professional staff waiting. Store your RV indoors or outdoors. Our inner storage units come in various sizes to meet all your camping equipment storage needs.
Every unit comes with 24-hour video surveillance and climate control. You’ll have access to your unit every day of the year.
Whether you’re storing a full-sized RV, organizing camping bins, or preparing for Alberta’s short camping season, our experienced team can help you find the right storage solution for your needs. Contact us for a free quote today.
Maple Leaf Self Storage - Blogs
Categories